LEARN TO explore
AURIN Data Provider (ADP) and QGIS
1. Install QGIS
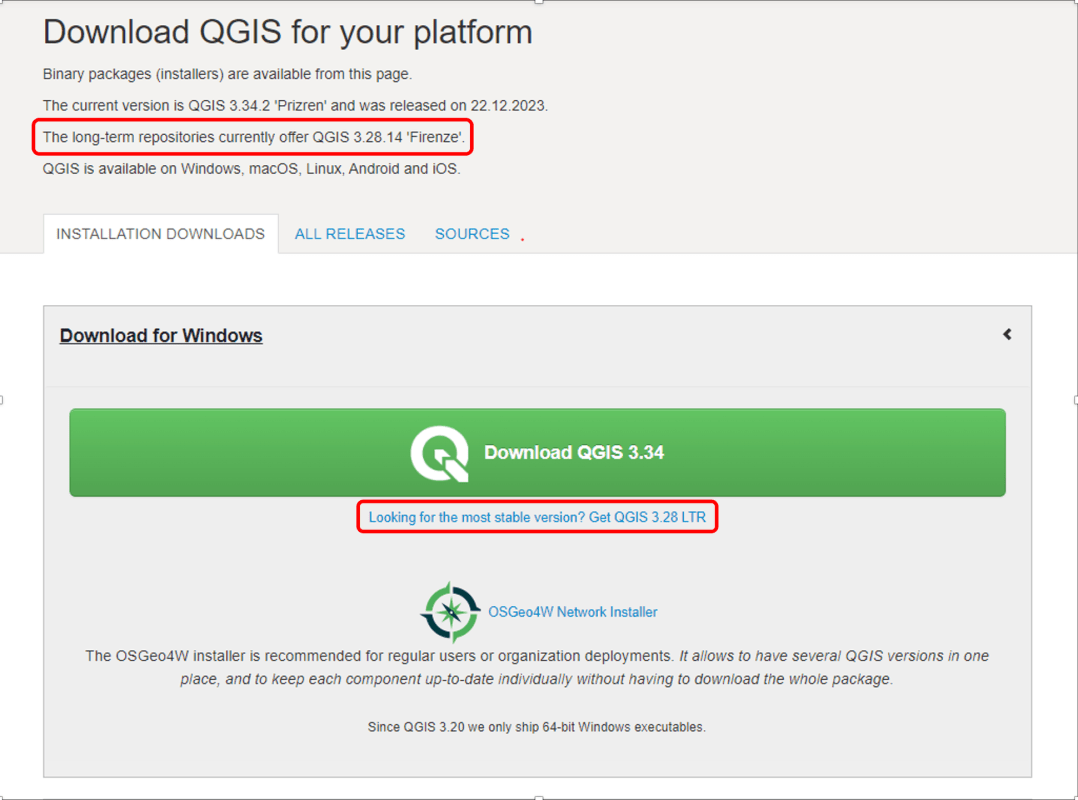
QGIS is a free and open desktop GIS application that provides a range of features, such as viewing, editing and analysing geospatial data. Our tutorial is based on QGIS version 3.28. You can download QGIS from its home page.
QGIS provides download choices for Windows, Mac, Linux, BSD users. We recommend to download the most recent Long term release version to achieve high stability. Please be aware that the installation can take a few minutes.
2. Connect to the AURIN API
Before starting this step, ensure you have generated your unique API Access Credentials, including your username and password, in the AURIN Access Dashboard. If you need guidance on creating your credentials, please refer to the tutorial here.
Please note the API access password will expire in 90 days for security reasons. You can always get a new password by visiting the API Access page.
To connect to the AURIN API via QGIS, please follow these steps:
Go to Layer → Add Layer → Add WFS Layer from the drop-down menu at the top of the application
(this is the same as going to Data Source Manager → WFS/OGC API – Features)

Click on the New button to generate a new connection and name it, for instance, “AURIN Data Connection”.
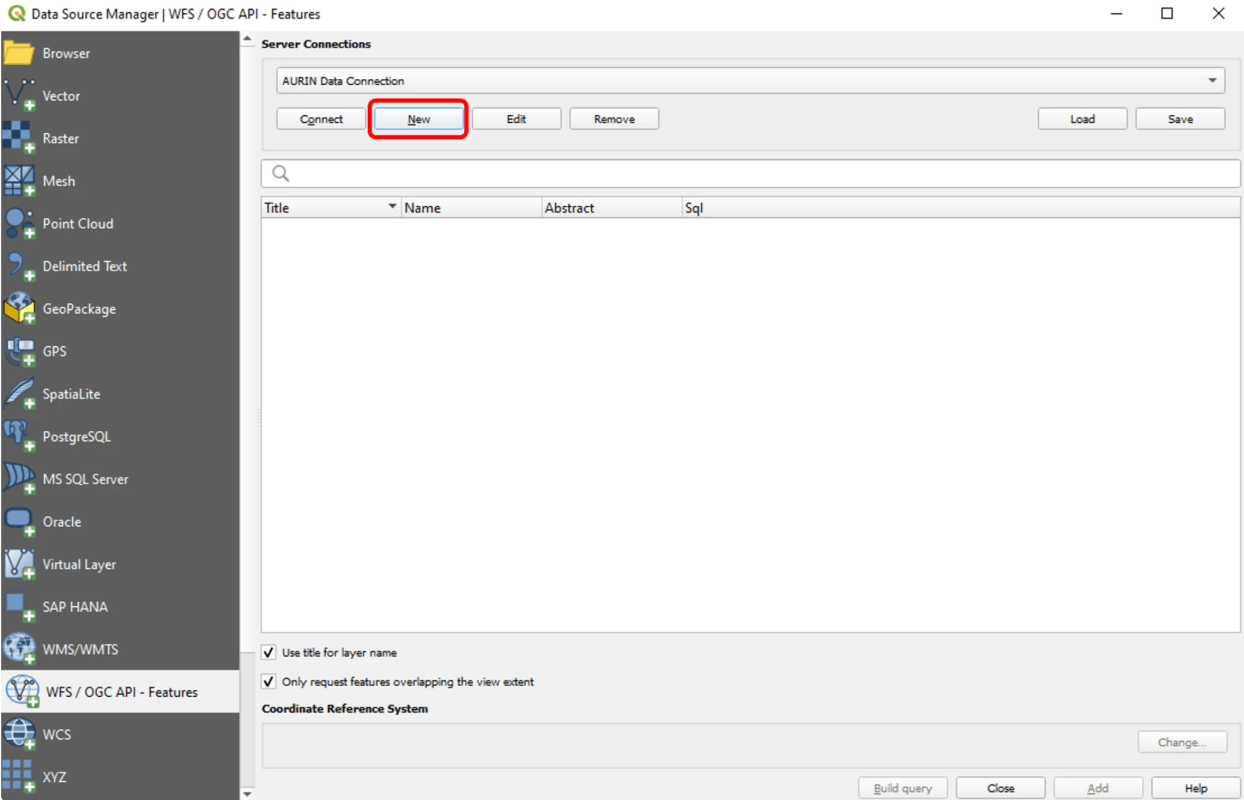
For the URL, enter https://adp.aurin.org.au/geoserver/wfs and then under the Authentication section in the Basic tab, fill in the Username and Password fields with the credentials you generated in the Access Dashboard. You can set the Max.number of features as 10000 for now. When finished, click OK to create the connection (If a security warning is presented, please take note of the recommendation and click OK when ready).

Click Connect.

2. Download AURIN Datasets
Once connected you will see a list of available datasets. To help find a dataset you can use the Filter and other options to search for a specific dataset by keyword. In this tutorial, we use “AURIN – National Education Facilities – Universities (Point) 2018”. To find this data in the list of available datasets, we can type the “universities” keyword in the filter box.


Click on your chosen dataset, then Add and Close. The dataset will then be added to your QGIS project. Now you have successfully downloaded datasets from ADP via QGIS.
Tip: Choose ‘Use title for layer name’ to record the dataset information.
4. View the Dataset Using QGIS
One of the great functions in QGIS is to view datasets in a map. If the datasets have geospatial information, we can view its locations in QGIS. Before jumping into this function, we need to start with understanding the concept of Coordinate Reference System (CRS).
Understanding coordinate systems
A Coordinate Reference System, or CRS, is a method of associating numerical coordinates with a position on the surface of the Earth. Geospatial data in common formats such as shapefile or geojson is typically associated with CRS information. The same location on earth can be described or visualised differently using different coordinate systems to fit different use cases. If this is your first time hearing about coordinate systems, you may find the following terms are very foreign, such as GDA94, WGS84. You will gain confidence after using QGIS a few times. If you are interested to know more, please access the Intergovernmental Committee on Surveying and Mapping (ICSM) website for more information about these two coordinate reference systems.
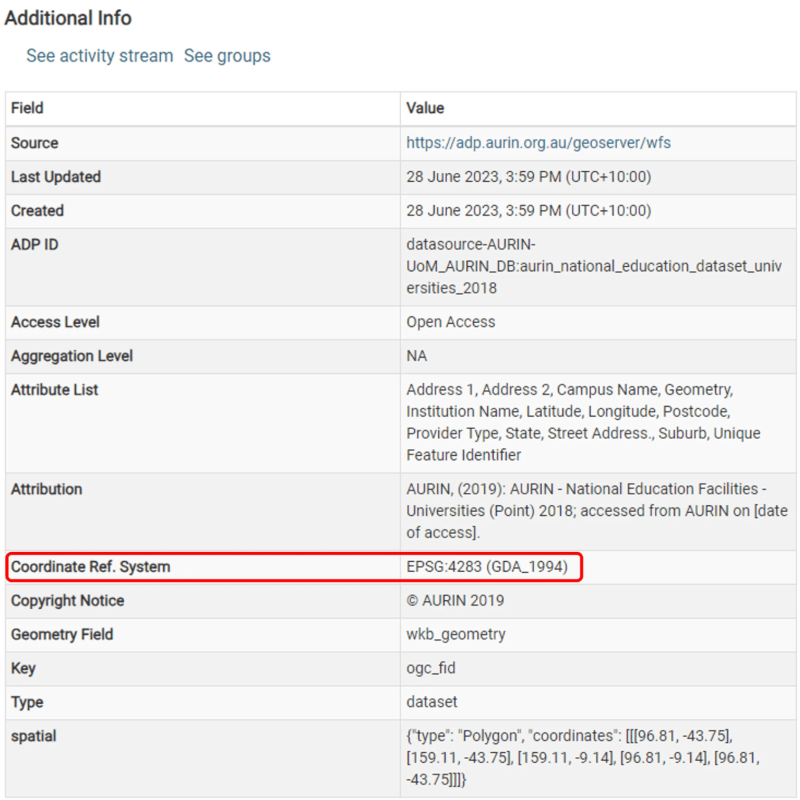
When you search through the AURIN Data Catalogue, you can find information about CRS in the Additional Info section for a specific dataset.
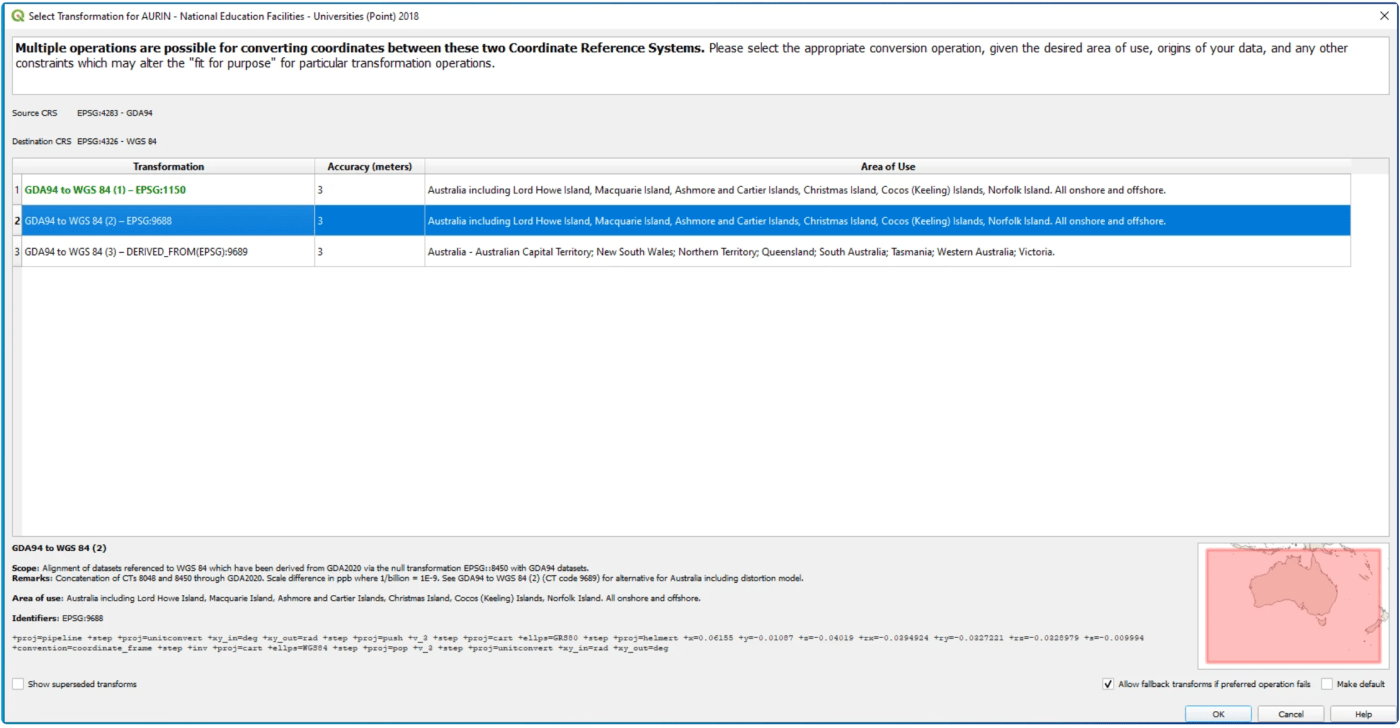
Such geospatial data can be easily transformed to other coordinate reference systems in QGIS. Most AURIN data layers typically use the Geocentric Datum of Australia 1994 (GDA94) system. When the CRS of the project is set to something other than GDA94, a choice of transformation dialogue box appears, asking the user to select a coordinate system to transform to from a list of options, as the screenshot below.
Choosing an appropriate transformation method to convert the source CRS to the target CRS can be a complex task. Going through the Scope, Remarks and Area of Use of each transformation will help us better understand on how each reprojection works and how each dataset can be better aligned with each other during transformation. If you are unsure what transformation method to use, select the default transformation method, as the default transformation method selected by QGIS provides a null reprojection with least deviation.
Viewing the Dataset
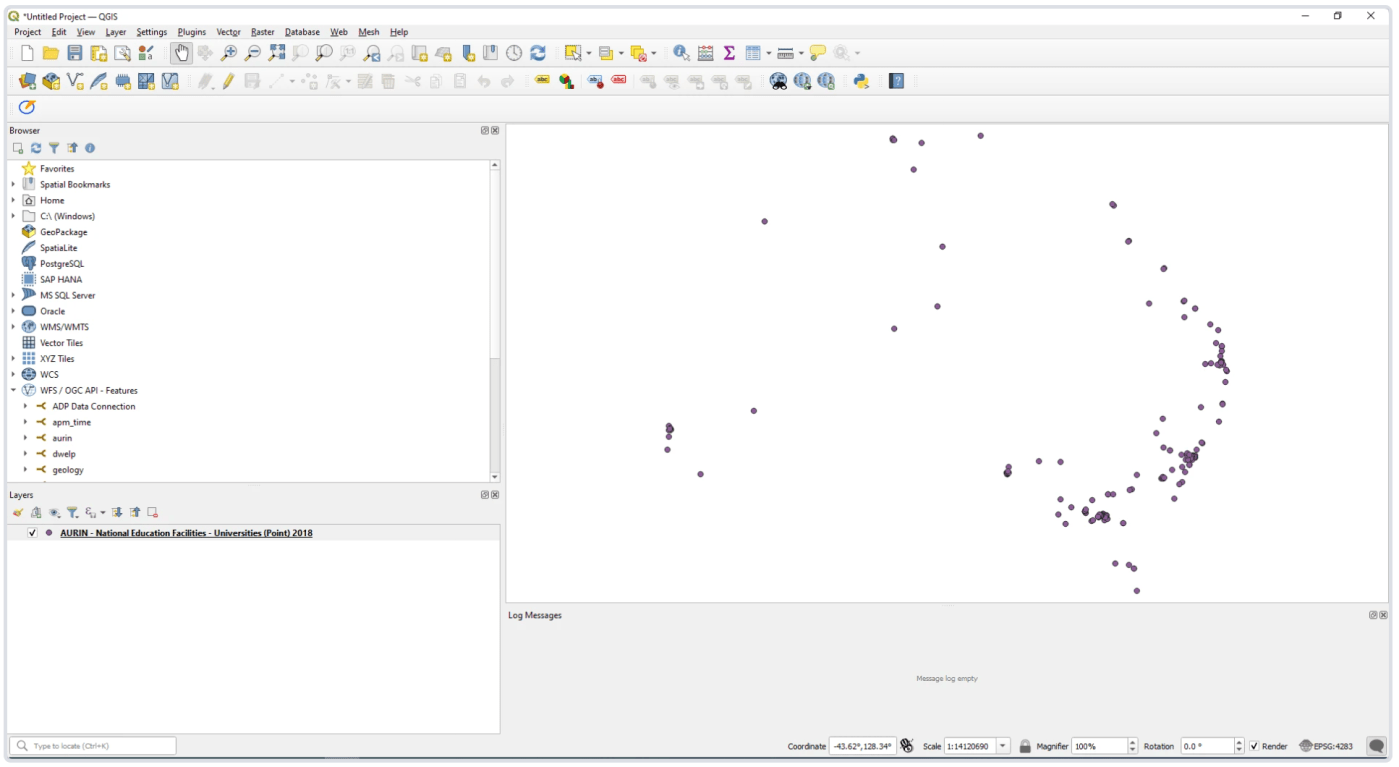
Your data should now appear in your QGIS project for you to view.
From here you can view the dataset’s corresponding table, change the symbology, perform further analysis, or export it to your local file directory in commonly used format such as GeoJSON or ESRI shapefile for editing in other tools or applications. Up to this point, we have successfully connected to the AURIN API and downloaded data in QGIS.
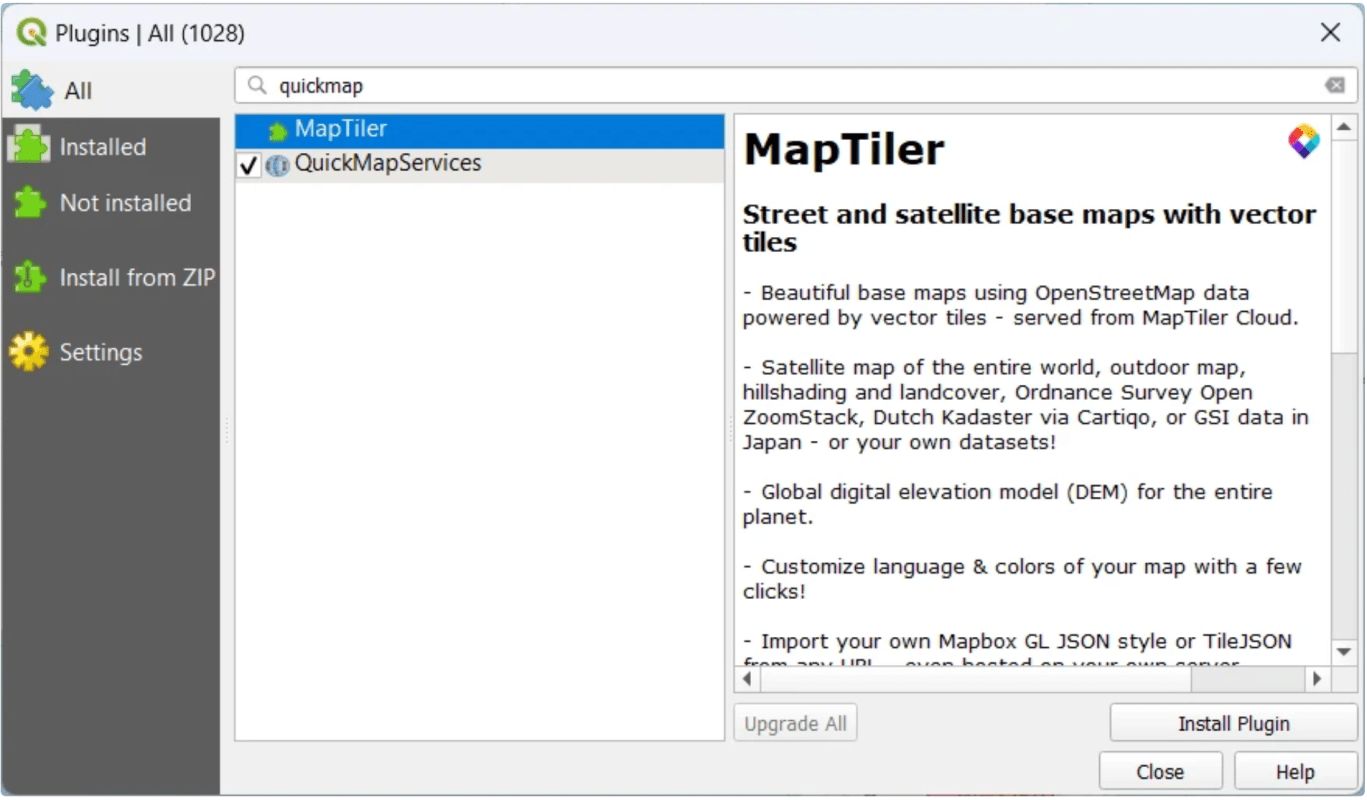
Adding Base Map (optional)
The current dataset display looks quite plain. We can add a base map layer for geolocation reference.
Click Plugins from the Menu Toolbar→ Search “QuickMapServices” in the search box, check the checkbox next to “QuickMapServices” → Install Plugin.

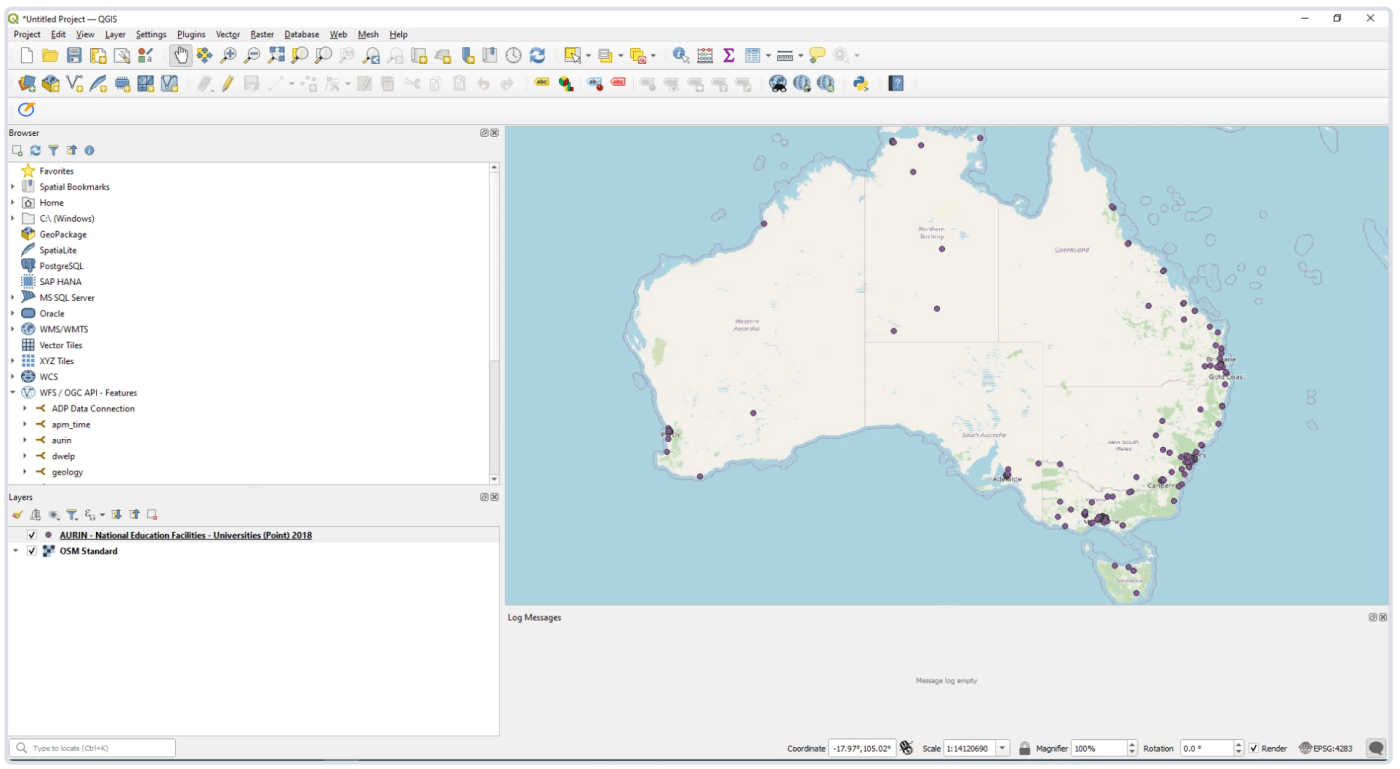
This is the National Education Facilities – Universities (Point) 2018 dataset with base map display.
5. Export the Dataset from QGIS
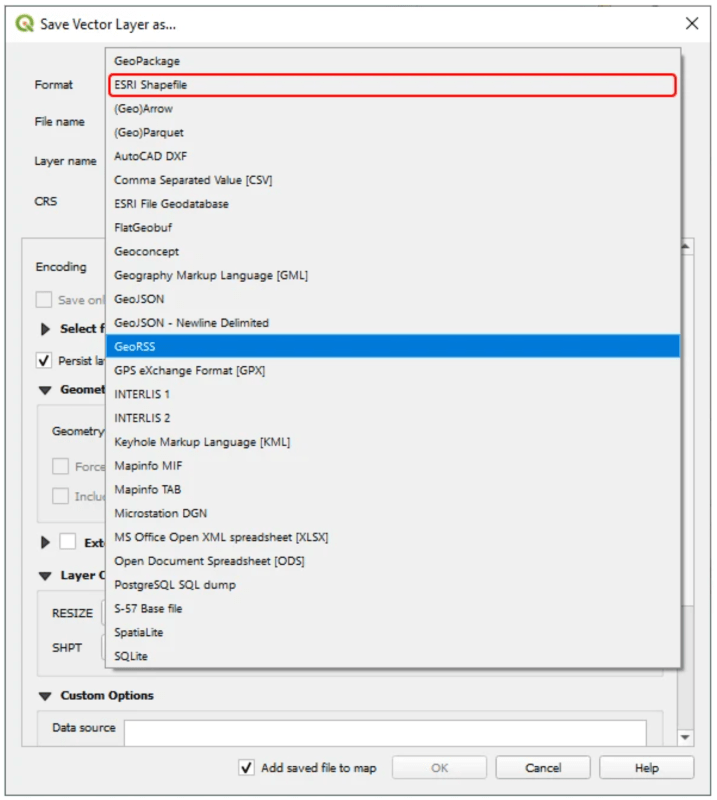
In QGIS, you can export the loaded data into different data formats, just right click the dataset name in Layers Panel, select Export → Save Feature As…, the Save Vector Layer as… window will pop up.
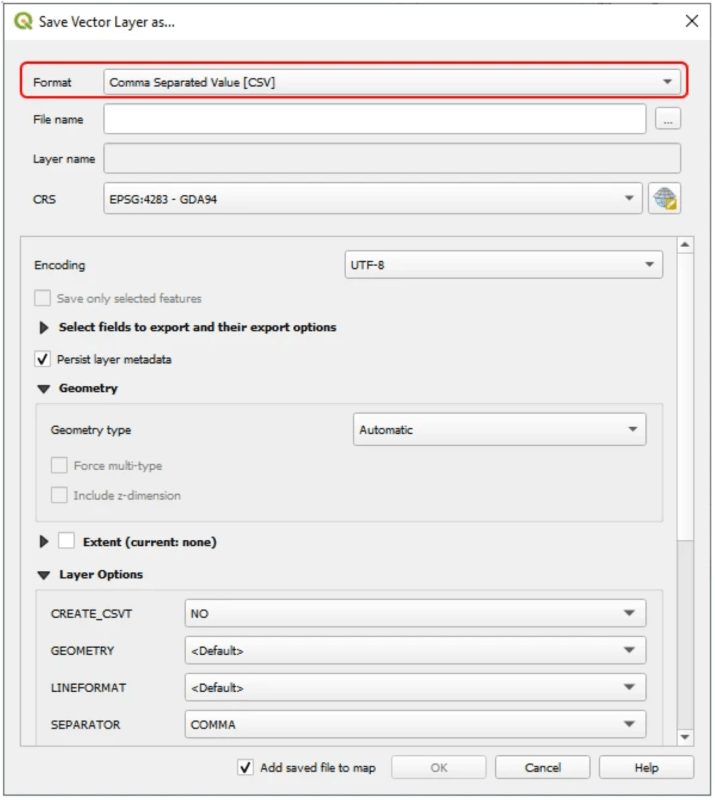
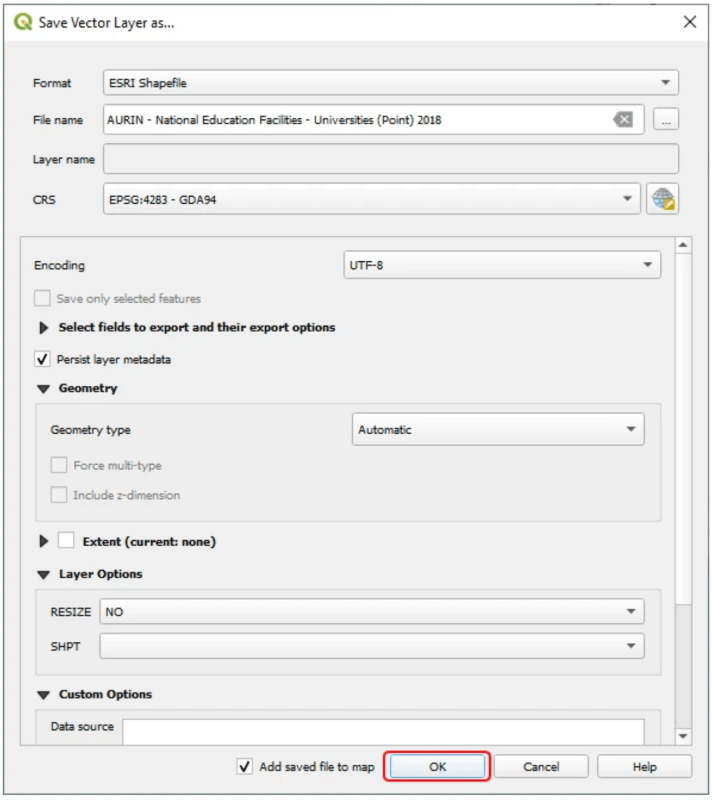
Click the Format section and you will find a drop down list of different data formats, choose the format you need (In this tutorial, we choose ESRI Shapefile), and put the File name same as the dataset name (AURIN – National Education Facilities – Universities (Point) 2018).
Click the […] icon next to File name section to save the exported layer in your preferred location, then click OK.
Other ADP User Guides
You can download a dataset from the Data Catalogue in different ways. Further information about this is available via the following AURIN Data Provider User Guides:
GIS
Learn how to connect to the AURIN Data Provider and explore AURIN data on Geographic Information Systems.


